Create an invoice
If you have integrated your BlueTape account with your ERP system, you should be able to continue creating invoices from your ERP and, based on your configuration, they should automatically sync to BlueTape.
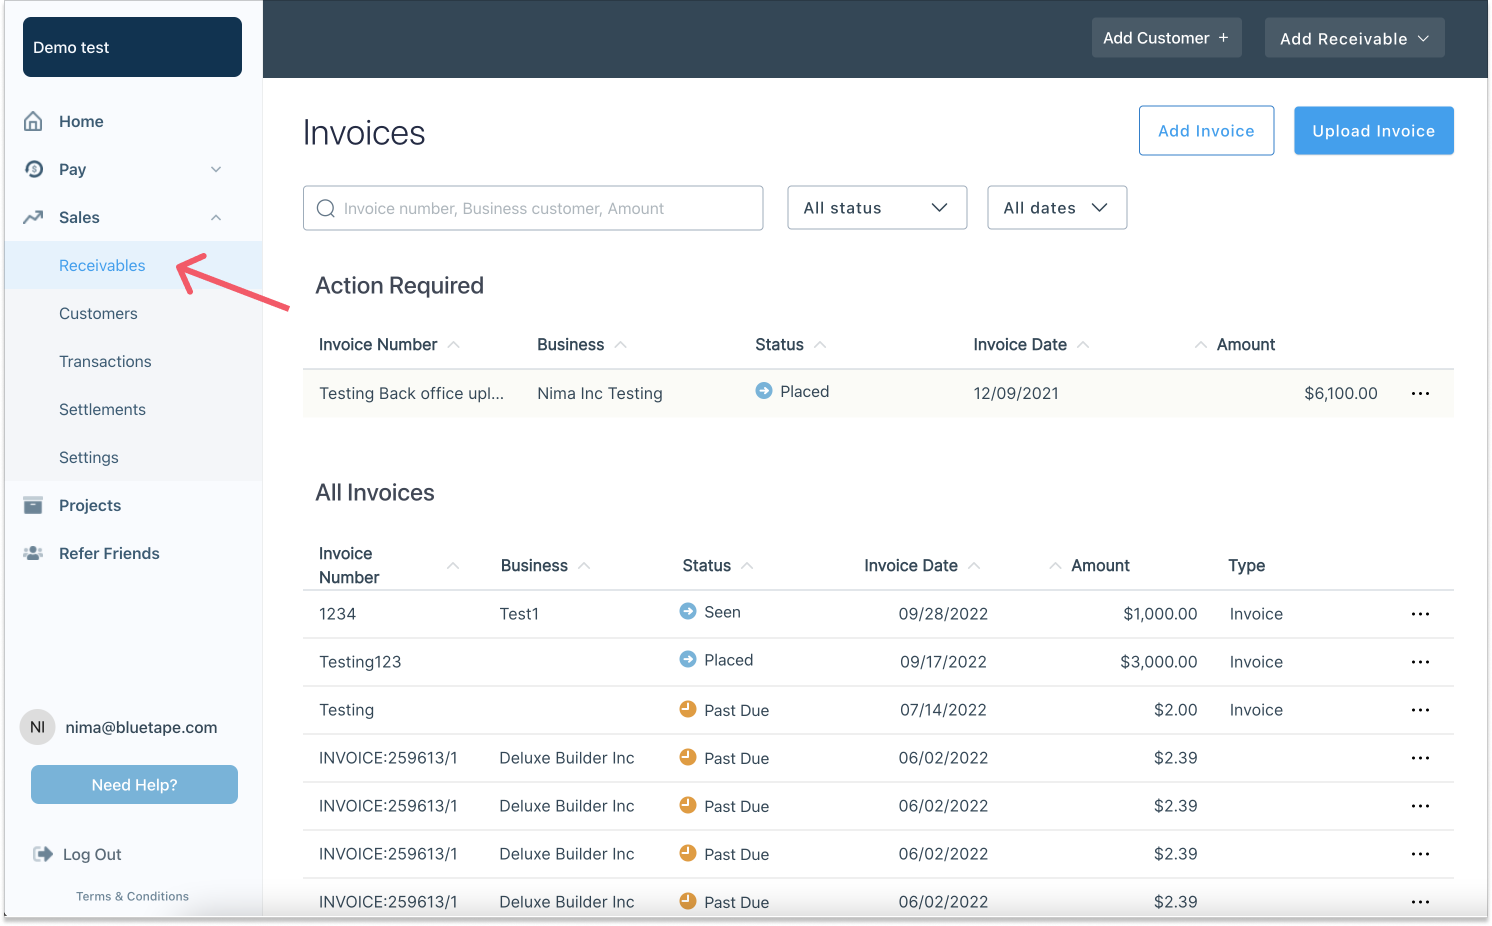
You can create an invoice manually in your account from the home page by clicking on the Add invoice box or by clicking Receivables under the Sales section of the left menu. The invoices dashboard will automatically load when you click on it.
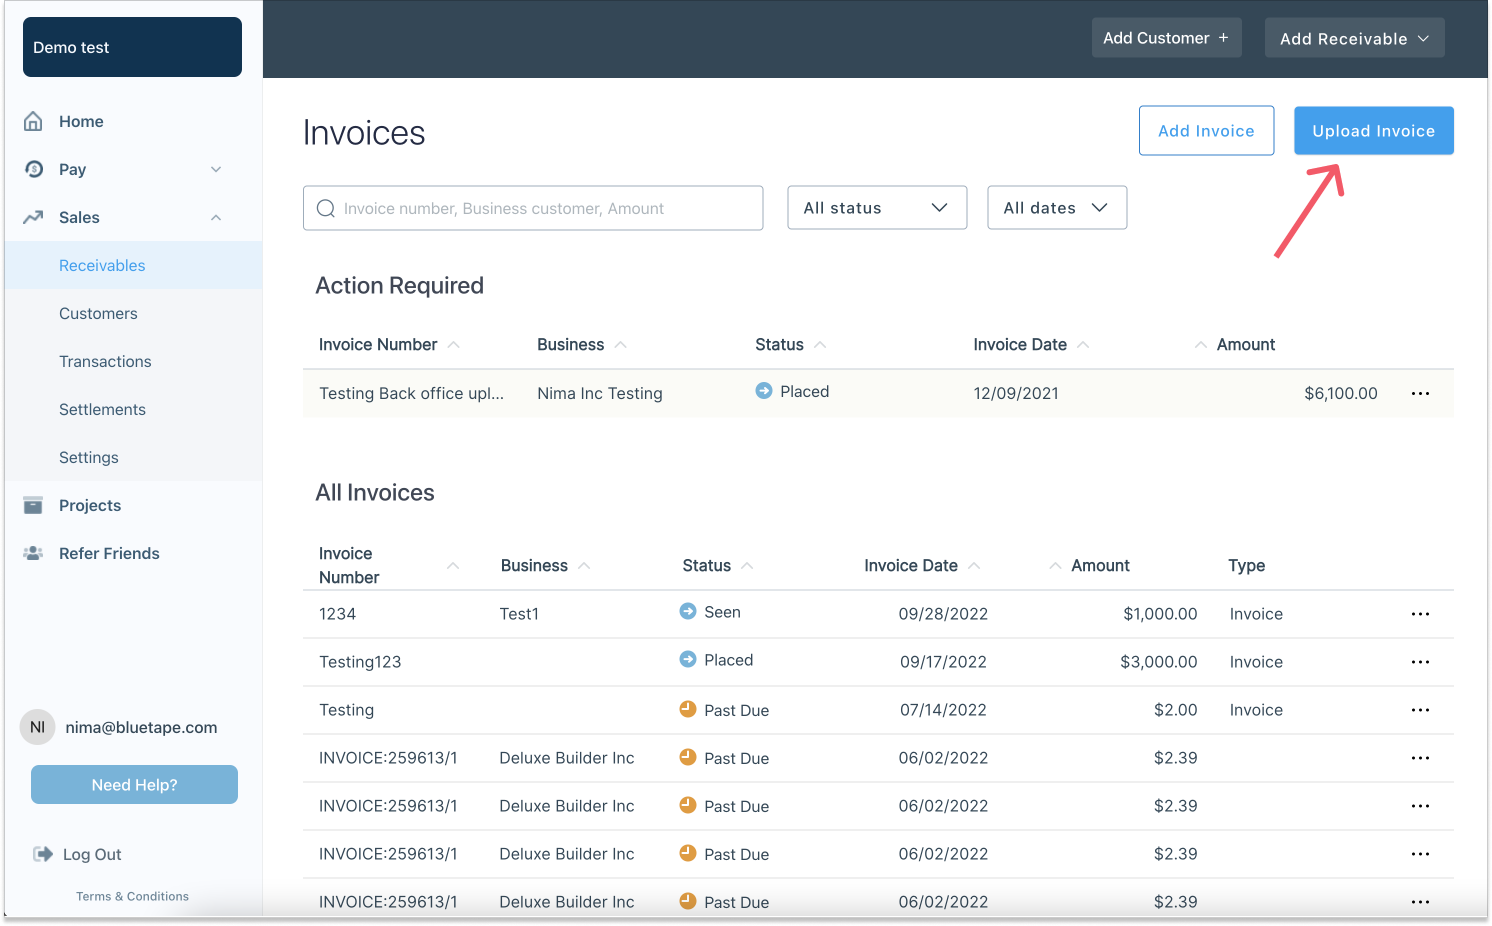
If you already have an existing invoice in your accounting system, locate the Upload Invoice button. This option will enable you to upload a copy of the invoice file (pdf, jpg, png, zip, eps, not more than 10mb). You will still need to complete the invoice details within BlueTape.
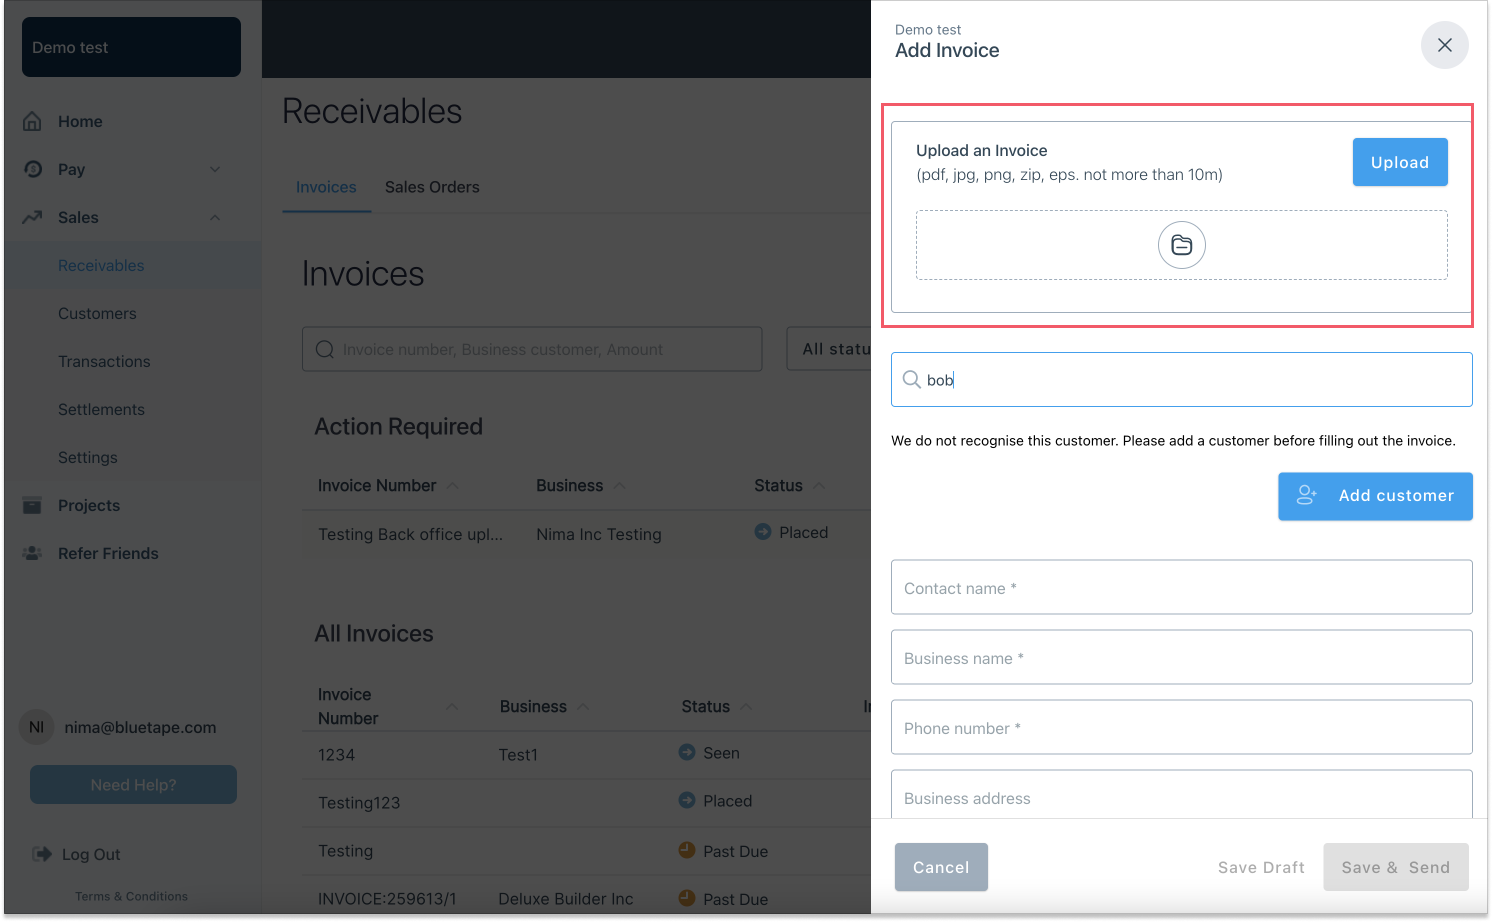
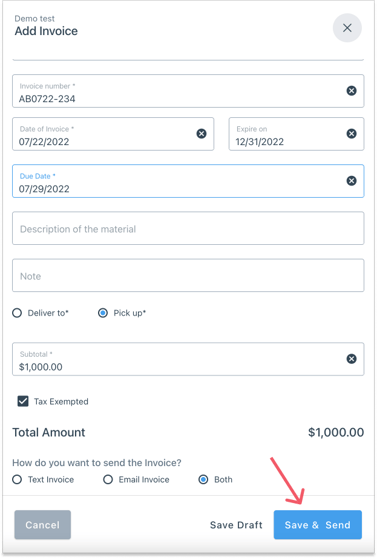
As an alternative, locate and click on the Add Invoice button. The Add Invoice box will load. You can upload the invoice in the top section of the box and fill in the customer information by either searching for the customer or manually adding the information.
In the search box, you can search for contact name, business name, phone number and email, and it will autofill the following sections. If a customer is not already added, you can manually fill out the invoice information. Next, fill in the invoice number that you are assigning to the invoice.
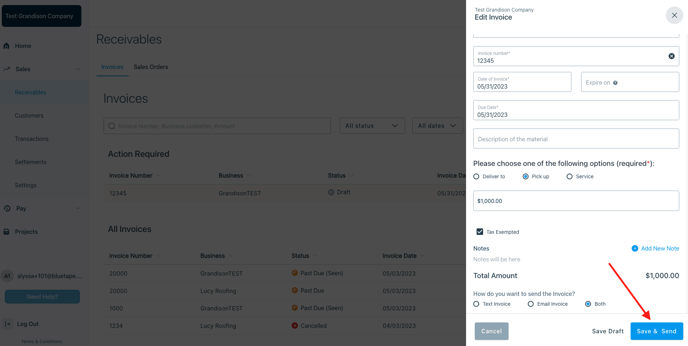
The date of the invoice and the due date are automatically set to the current date, but you can select the date that you would like the invoice to be due by. Customers can still pay a late invoice after the due date. You can set an expiration date, and a customer can not pay an invoice after that date.
The description of material and notes box are for the supplier to provide any notes they believe are necessary to the invoice.
Next, you can select whether the invoice is “pick up” or “deliver to”. If pick up is selected, customers will pick up their order. If deliver to is selected, a delivery address box will appear to add a delivery address.
Add the invoice total. There is an option to select whether in the invoice is tax exempted. For BlueTape Credit, the invoice needs to be a minimum of $1,000.
Select how you want the invoice to be sent to your customer. You can select Text Invoice, Email Invoice, or Both.
You can then cancel, save as a draft, or save and send. Select the Save Draft button if you are missing information and want to come back and finish creating the invoice later, or if it's all set up but you don't want to submit it yet.
If you select Save & Send, your customer will receive a notification that they have been sent an invoice through the channel that was selected.
💡 Tip: When possible, select sending your customers notifications both via text and email so you ensure they will see it.
Send an invoice
Send invoices via text, email, or both, and accept all major credit cards securely.
Get paid faster with ACH, avoid late payments, and make it easy for your team to collect payments.
When you finalize the invoice creation process and all mandatory fields are complete, the Save & Send button will be enabled at the bottom of the box. Clicking on it will send the invoice to the customer through text, email, or both, based on the method you have selected.
 When you're ready to send out an invoice you've previously saved, you will be able to locate it under the Receivables tab. Locate the filters on the top of the dashboard and ensure you are filtering a date that includes the day you created the invoice draft. Then use the Status filter to find only those tagged as draft.
Identify the invoice you are ready to send out, click on it, and the invoice details box will show. Finish filling in any missing fields, make adjustments, and click on the Save & Send button at the bottom of the box.
View invoices from customers
Outstanding invoices can be viewed on the home page of your account.
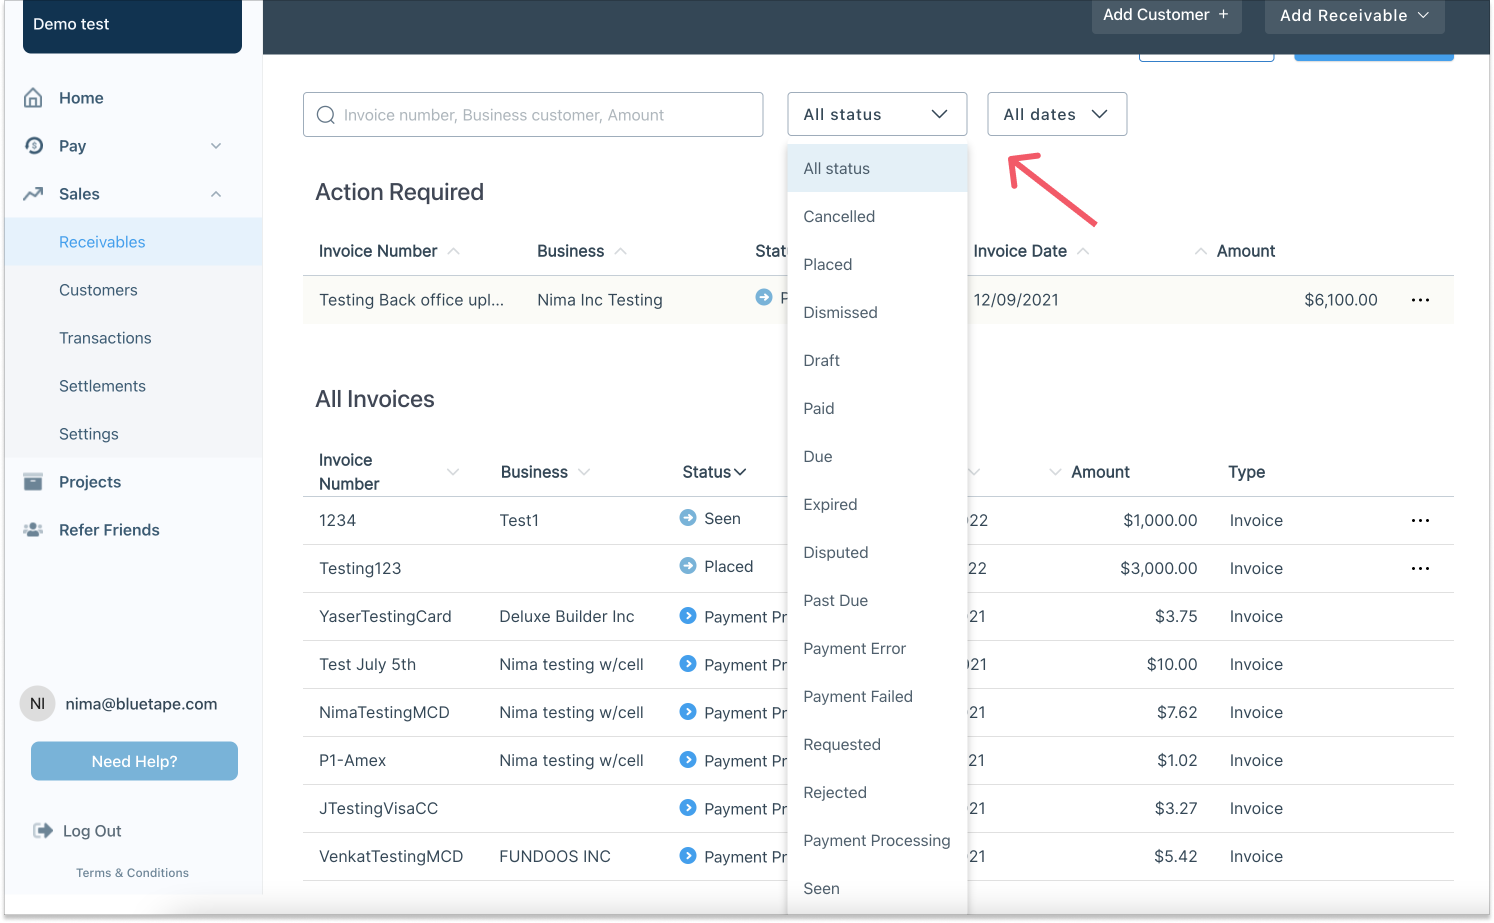
Invoice statuses
Invoice statuses can be viewed in the Receivables and Transactions tabs.
The invoice statuses are:
- Placed: Invoices that have been sent to customers
- Seen: The customer has opened the text message or email and has seen the invoice
- Expired: When you have set an expiration date to an invoice when creating it and such date has passed
- Drafted: Invoices that have been created but haven’t been sent to customers yet
- Dismissed: Customer received and dismissed the invoice without making a payment
- Canceled: Invoices canceled in the Get Paid Console
- Past due: Invoices that are past their due date
- Paid: Invoices paid
You can click on any existing invoice to get more information on it, including status, customer and transaction details.
Drafted invoice
An invoice that has been created but has not yet been sent to the customer will go into a Draft. Your invoice drafts can be found on the Receivables page under Action Required.
An invoice would go into a Draft status if BlueTape is not able to match the invoice to your customer. For example, if the customer name, business name, email address, and/or phone number on the invoice does not match the customer’s information within your BlueTape console, the invoice will be placed as a draft automatically and will require manual editing in order to send to your customer.
To correct the draft invoice and send it to your customer, you will follow the below steps:
Click on the Sales tab on the left side menu of your BlueTape console. Then click on the Receivables tab.
You will find your Draft invoices on the Receivables page under Action Required.
Click on the invoice and the invoice details will appear in a new window on the right side of your screen.
Click on the Edit Invoice button.
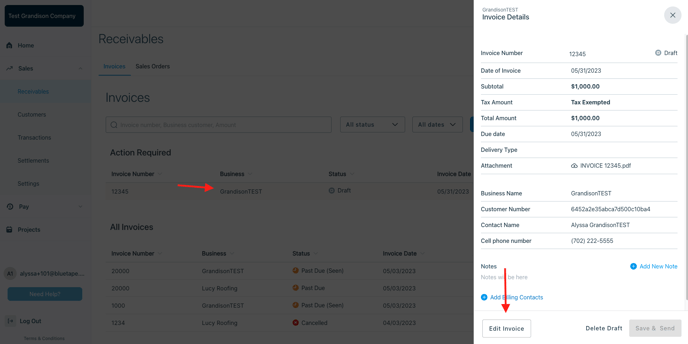
Once you have clicked on the Edit Invoice button, you will see the attached invoice and its details. Double click the attached invoice to view its details.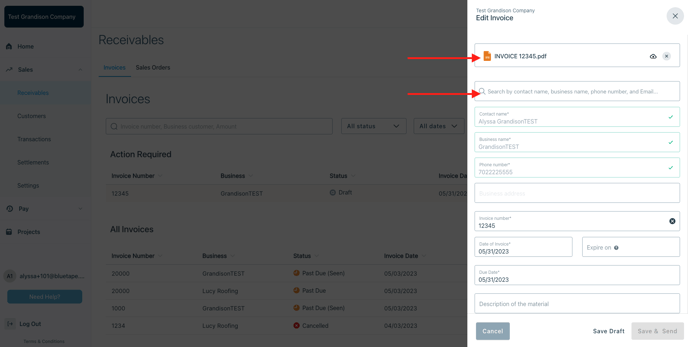
Once you have opened the attached invoice, you will then see your customer details. You will then search for the customer by name, business name, phone number or email address. If BlueTape is able to find the customer within your BlueTape console, a suggested match will appear. If the suggested match is correct, click on the match, and the information will auto-populate. *Note that you will need to select either ‘Deliver to,’ ‘Pick up,’ or ‘Service.’
If a suggested match does not appear, this likely means the customer does not exist in your BlueTape console. Your next step would then be to add the customer. 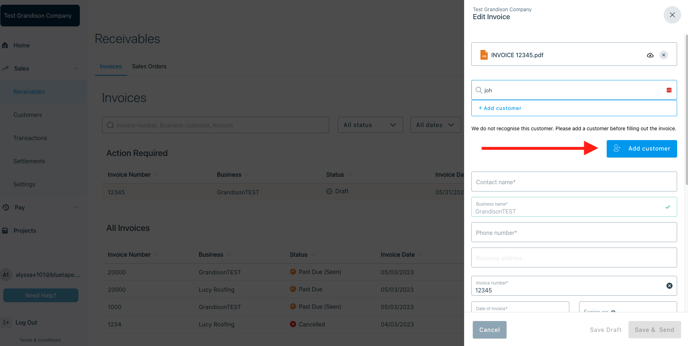
Once the the customer information has been added and all required fields are complete, you will then see a blue Save & Send button. Click on this to send the invoice to your customer.